AdGuard Home: A world without ads and trackers!
You might have heard about Ublock Origin or PiHole, let me introduce to you AdGuard, and especially AdGuard Home!
You might have heard about Ublock Origin or PiHole, let me introduce to you AdGuard, and especially AdGuard Home!
How does it work?
AdGuard Home is a network-wide software for blocking ads & tracking. After you set it up, it’ll cover ALL your home devices, and you don’t need any client-side software for that. With the rise of Internet-Of-Things and connected devices, it becomes more and more important to be able to control your whole network.
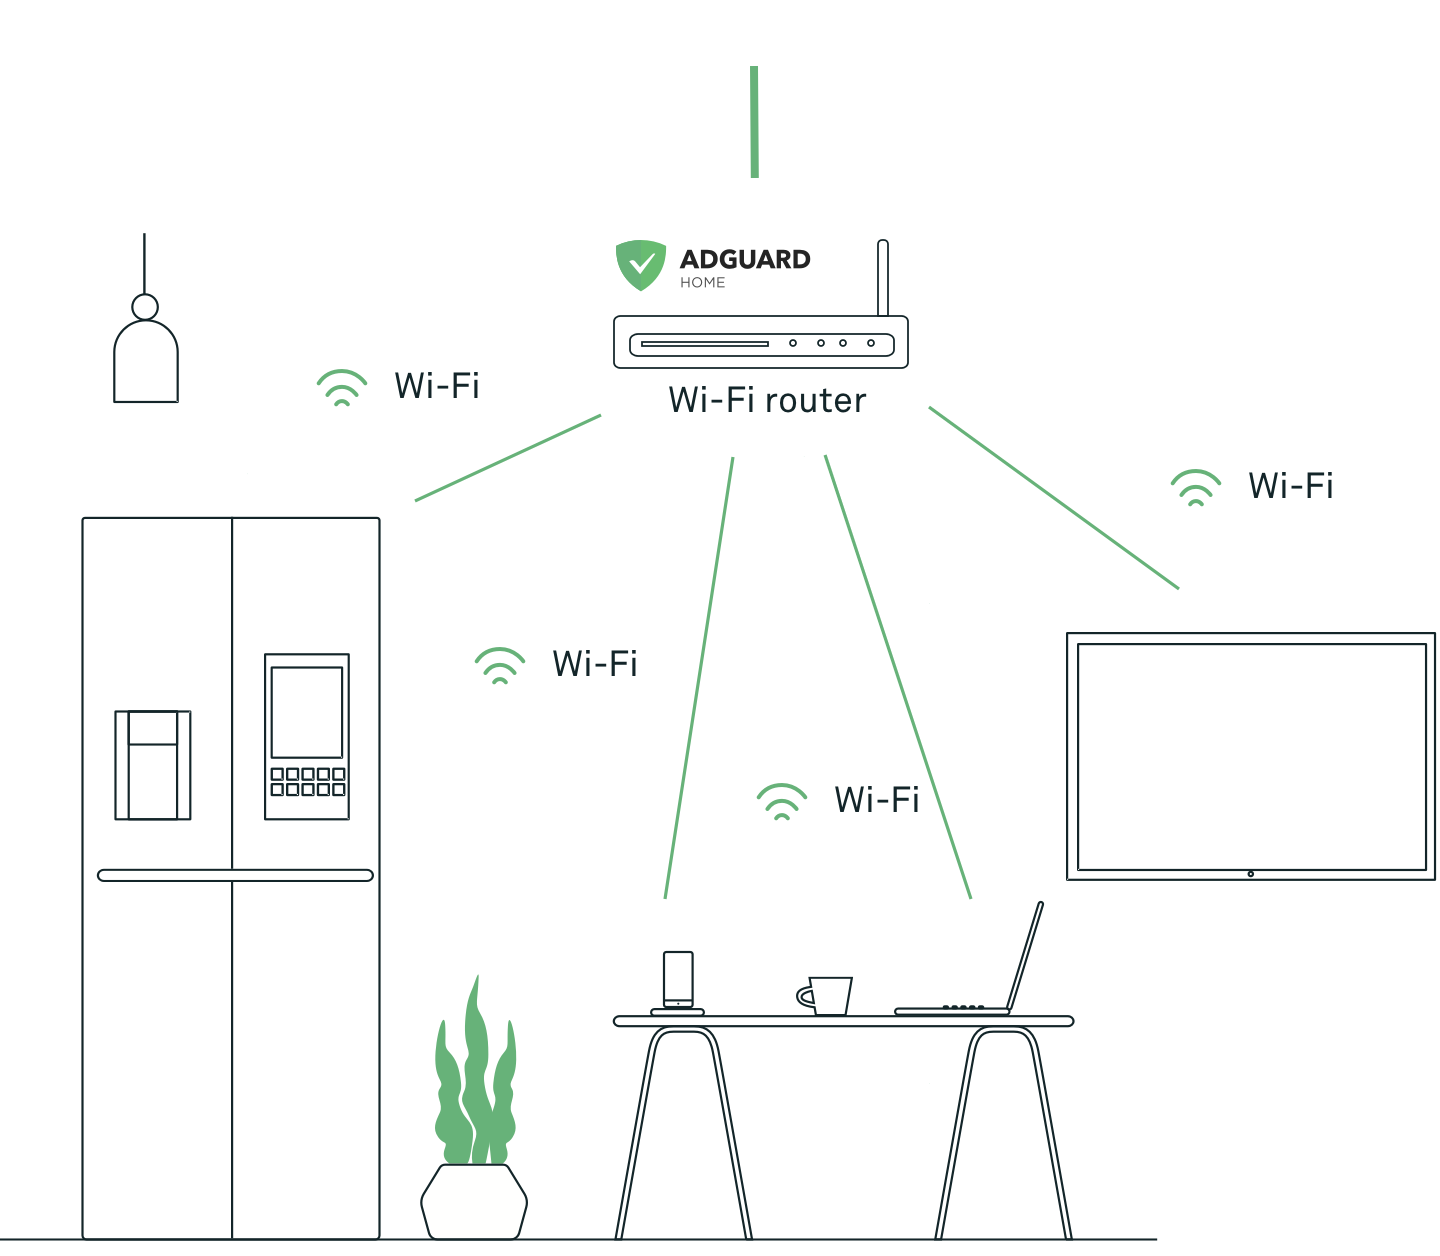
By running AdGuard Home on your home server, you will be able to use it as DNS and let it filter all ads and trackers on ALL your devices! The world without ads and trackers is yours!
So what are the differences with UBlock Origin and PiHole?
You can easily install it on a Raspberry Pi for example. On my side, I made the choice to run it on my Synology NAS through Docker.
Setup via Docker
First challenge: the port number!
Rares are the devices and routers where you can easily setup a custom port number for your DNS server. Therefore, you need to be able to expose the port 80 of your server hosting AdGuard Home (and a bench of other ports), which is kind of tricky on a Synology NAS.
I finally find out a solution, using a virtual network with a dedicated IP address to run the container inside it. And as it's a brand new dedicated IP address, all ports are available!
With the help of Docker macvlan, I set it up as below in my docker-compose file.
networks:
  default:
    driver: macvlan
    driver_opts:
      parent: eth0
    ipam:
      config:
        - subnet: 10.1.1.0/24
          gateway: 10.1.1.1
          ip_range: 10.1.1.192/27
          aux_addresses:
            host: 10.1.1.222
Few explanations regarding this macvlan setup:
- driver_opts.parent represents the source to bring internet to this macvlan. As my Synology NAS is connected through its first Ethernet port, it's the classical eth0. You can easily check the name of your interface by running "ifconfig" in ssh
- ipam.config.gateway is the address of your network router
- ipam.config.subnet is the subnet address matching your gateway
- ipam.config.ip_range is the range of IP this macvlan is going to deliver to any devices on it. I have defined 10.1.1.192/27 to get a range from 193 to 222 to avoid any conflict with my network router DHCP which is not delivering those addresses. You can define your range with any calculator available online.
Nevertheless, if you are already a macvlan's expert, you might know about the restriction access between a macvlan and its host. No worries, a bypass is explained in this article!
Docker Macvlan Documentation
Docker compose
Now it's time to build your docker compose completely and don't forget to create folders for your volumes before running!
version: "2"
services:
  adguardhome:
    container_name: adguardhome
    image: adguard/adguardhome:latest
    hostname: adguardhome
    restart: always
    domainname: example.com         # If you plan to expose it outside
    networks:
      mynet:
        ipv4_address: 10.1.1.199 # Fix the IP address inside your range
    environment:
      - PUID=1026
      - PGID=100
      - TZ=Europe/Paris
    dns:
      - 127.0.0.1
      - 8.8.8.8
    ports:
      - 53/udp
      - 67/udp
      - 68/tcp
      - 68/udp
      - 80/tcp
      - 443/tcp
      - 853/tcp
      - 3000/tcp
    environment:
      ServerIP: 10.1.1.199  # Need to match ipv4_address
      VIRTUAL_HOST: adguardhome.example.com  # Match hostname + domainname
      WEBPASSWORD: ""                        # Add password (if required)
    volumes:
      - /volume1/docker/adguard/config:/opt/adguardhome/conf
      - /volume1/docker/adguard/work:/opt/adguardhome/work
networks:
  mynet:
    driver: macvlan
    driver_opts:
      parent: eth0
    ipam:
      config:
        - subnet: 10.1.1.0/24     # My network subnet
          gateway: 10.1.1.1       # My network gateway
          ip_range: 10.1.1.192/27 # Range from 192 to 222
          aux_addresses:
            host: 10.1.1.222 # To avoid the network to give this IP. Reserved for mynet-shim
How does it look on my Synology NAS:
adguard/
      |_ docker-compose.yaml
      |_ config/
      |_ work/
And now, you just have to launch your docker-compose file with the following command cd adguard && docker-compose up -d
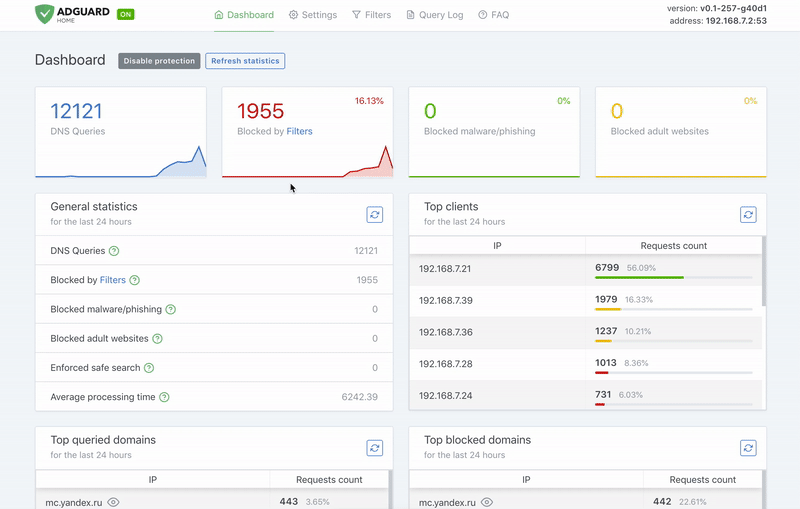
You can now access the AdGuard Home interface via the IP address you defined for it, 10.1.1.199 in my case. I will not detail here all features of AdGuard Home in this article as its documentation is pretty complete, but I can mention that the interface is clean and super straight forward!
Setup AdGuard Home as your default DNS
As your DNS is now running and fully configured, let's send it some traffic to resolve and filter! It's time to kill some ads and trackers!
You can decide to either doing it manually on each device either directly in your router.
Manually
Even if the ultimate solution to remove all ads on ALL your device is the next method to come, doing it manually on your computer only, as a first step, will help you to see the incoming traffic and to do the right setup on AdGuard Home before deploying it on all your devices. I will not enter into details about the How-To, you can find some good guides below.
In your router
The objective is to define your AdGuard Home as preferred DNS inside your router directly, so it's going to spread it automatically to all your devices (You might need to wait a bit or to restart the devices so they can get the update!)
This setup is super standard on most of the router but can be very specific to find. Look of "Preferred DNS".
I'm using a UniFi USG router and this setting is located in Networks > LAN > DNS (DHCP Name Server).
Some routers give you the option to setup a secondary one in case of the first one is not responding, I'm using Quad9 (9.9.9.9).
Advanced configuration
Here are some of the DNS blocklists I'm currently using:
- AdGuard https://adguardteam.github.io/AdGuardSDNSFilter/Filters/filter.txt
- AdAway https://adaway.org/hosts.txt
- MalwareDomainList.com Hosts List https://www.malwaredomainlist.com/hostslist/hosts.txt
- AdGuard Social Media filter https://filters.adtidy.org/extension/chromium/filters/4.txt
- AdGuard Tracking Protection filter https://filters.adtidy.org/extension/chromium/filters/3.txt
- AdGuard Base filter https://filters.adtidy.org/extension/chromium/filters/2.txt
- AdGuard Annoyances filter https://filters.adtidy.org/extension/chromium/filters/14.txt
- AdGuard Filter unblocking search ads and self-promotion https://filters.adtidy.org/extension/chromium/filters/10.txt
- AdGuard Russian filter https://filters.adtidy.org/extension/chromium/filters/1.txt
- AdGuard German filter https://filters.adtidy.org/extension/chromium/filters/6.txt
- AdGuard French filter https://filters.adtidy.org/extension/chromium/filters/16.txt
- AdGuard Japanese filter https://filters.adtidy.org/extension/chromium/filters/7.txt
- AdGuard Dutch filter https://filters.adtidy.org/extension/chromium/filters/8.txt
- AdGuard Spanish/Portuguese filter https://filters.adtidy.org/extension/chromium/filters/9.tx
- AdGuard Turkish filter https://filters.adtidy.org/extension/chromium/filters/13.txt
- AdGuard Mobile Ads filter https://filters.adtidy.org/extension/chromium/filters/11.txt
- AdGuard Safari filter https://filters.adtidy.org/extension/chromium/filters/12.txt
- AdGuard Simplified domain names filter https://filters.adtidy.org/extension/chromium/filters/15.txt
- Blocklist Tracking https://blocklist.site/app/dl/tracking
- Blocklist Spam https://blocklist.site/app/dl/spam
- Blocklist Scam https://blocklist.site/app/dl/scam
- Blocklist Ransomware https://blocklist.site/app/dl/ransomware
- Blocklist proxy https://blocklist.site/app/dl/proxy
- Blocklist Phishing https://blocklist.site/app/dl/phishing
- Blocklist Malware https://blocklist.site/app/dl/malware
- Blocklist Gambling https://blocklist.site/app/dl/gambling
- Blocklist Fake News https://blocklist.site/app/dl/fakenews
- Blocklist Fraud https://blocklist.site/app/dl/fraud
- Blocklist Drugs https://blocklist.site/app/dl/drugs
- Blocklist Crypto https://blocklist.site/app/dl/crypto
- Blocklist Redirect https://blocklist.site/app/dl/redirect
Enjoy a world without ads and trackers!
